1. Introduction
In this tutorial, we’ll discuss two of the main building block of an application – components and props.
Component is an independent, reusable piece of which the UI is made. Components make it possible to break down the UI of your application into smaller reusable components.
A component can be written as a JavaScript function or as a class. A component written like a JavaScript function:
- accepts arbitrary inputs (called props, short form of properties).
- returns React elements describing what should be visible on the screen.
2. Example
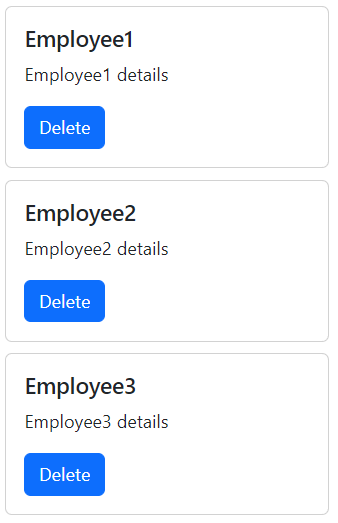
Let us understand the components with the help of an example.
Suppose, we want to show the details of employees.
Following is our App component.
function App() {
  return (
    <div>
      <div className="card" style={{ width: "18rem", marginTop: "10px", marginLeft: "10px" }}>
        <div className="card-body">
          <h5 className="card-title">Employee1</h5>
          <p className="card-text">Employee1 Details</p>
          <a href="#" className="btn btn-primary">
            Delete
          </a>
        </div>
      </div>

      <div className="card" style={{ width: "18rem", marginTop: "10px", marginLeft: "10px" }}>
        <div className="card-body">
          <h5 className="card-title">Employee2</h5>
          <p className="card-text">Employee2 Details</p>
          <a href="#" className="btn btn-primary">
            Delete
          </a>
        </div>
      </div>

      <div className="card" style={{ width: "18rem", marginTop: "10px", marginLeft: "10px" }}>
        <div className="card-body">
          <h5 className="card-title">Employee3</h5>
          <p className="card-text">Employee3 Details</p>
          <a href="#" className="btn btn-primary">
            Delete
          </a>
        </div>
      </div>
    </div>
  );
}

export default App;
In this example, we have used a Bootstrap card for each employee. You must have observed that for each employee, we have duplicated the code except the employee related information. Other than the employee information, rest of the code is same. This is a scenario where we can make a separate component for the employee.
function Employee(props) {
  return (
    <div className="card" style={{ width: "18rem", marginTop: "10px", marginLeft: "10px" }}>
      <div className="card-body">
        <h5 className="card-title">{props.employeeName}</h5>
        <p className="card-text">{props.employeeDetails}</p>
        <a href="#" className="btn btn-primary">
          Delete
        </a>
      </div>
    </div>
  );
}

export default Employee;
You must have noticed that the employee details are not hard coded. Instead, we are using the {props.employeeName} and {props.employeeDetails}. Here, props is the properties which this component receives.
The App component looks like the following:
import Employee from "./Employee";
function App() {
  return (
    <div>
      <Employee employeeName="Employee1" employeeDetails="Employee1 details" />
      <Employee employeeName="Employee2" employeeDetails="Employee2 details" />
      <Employee employeeName="Employee3" employeeDetails="Employee3 details" />
    </div>
  );
}

export default App;
The employeeName and employeeDetails are passed as properties to the Employee component.
3. Props
In case of a user defined component, JSX attributes and children to the component are passed as a single object called props. The Props is used to pass data from parent to a child. An important point to note about Props is that this is a one way flow of data. Child can’t push props back up.
Communication using the Props systems is done in following steps:
- Add attributes to a JSX element.
- React collects the attributes and puts them in an object.
- Props objects is the first argument to the child component function.
- We use Props object in the child component as per our requirement.
4. Argument destructuring in props
Instead of writing {props.employeeName} and {props.employeeDetails} and so on, we can take these in a variable and use these values. For example:
function Employee(props) {
	const employeeName = props.employeeName;
	const employeeDetails = props.employeeDetails;
	.
	.
	.

	<h5 className="card-title">{employeeName}</h5>
    <p className="card-text">{employeeDetails}</p>
or in short form simply const {employeeName, employeeDetails} = props
Another short way of argument destructuring is the following:
function Employee({employeeName, employeeDetails}) {
	.
	.
	.

	<h5 className="card-title">{employeeName}</h5>
   <p className="card-text">{employeeDetails}</p>
5. Component names should start with a capital letter
React components should start with a capital letter. Components starting with a lowercase are treated as DOM tags. For example, <div /> is a DOM tag whereas <App /> represents a component.
6. Function and Class components
React component can be written as JavaScript function or as a Class.
Following is an example of a React component written as a JavaScript function:
function Welcome(props) {
  return <h1>Hello, {props.name}</h1>;
}
The same component can be written as an ES6 class:
class Welcome extends React.Component {
  render() {
    return <h1>Hello, {this.props.name}</h1>;
  }
}
7. Props are read-only
Whether the component is written as a function or a class, it must never modify its own props.
In other words, All React components must act like pure functions with respect to their props.
8. Conclusion
In conclusion, React components and the props system enables you to create dynamic, reusable, and maintainable user interfaces with ease. By understanding how components encapsulate UI elements and behavior, and how props facilitate the flow of data between components, developers can build complex applications efficiently.