1. Introduction
In this tutorial, you will learn what are roles and authorities and how they work in Spring. You will also learn how to configure your resource server to validate user role. In previous tutorials, we accessed a protected resource at a resource server using a valid token. In this tutorial, we’ll assign user a role and will access the protected resource. At resource server, we’ll first check if the accessing user has valid role or not. If the role is valid, then the user should be able to get access else not.
2. Roles and Authorities
In the Spring Security framework, the terms “role” and “authority” are often used interchangeably, but there are some nuanced differences. In loose terms to understand these concepts, you can say that a role is a group of authorities. In terms of Spring, there is not much difference in “role” and “authority”. Spring Security does not provide any API to create a role and add authorities to the role.
Authority: An authority represents a specific permission or right that is granted to a user. In Spring Security, authorities are typically represented by a GrantedAuthority object, which is an interface that provides a single method getAuthority(). Authorities can be any string and are usually used to represent permissions at a finer level of granularity.
Role: A role is a specific type of authority prefixed with ROLE_. For example, if you define a role as ROLE_ADMIN, it is technically an authority with the prefix “ROLE”. Roles are often used to group multiple authorities or permissions together for easier management. For example, ROLE_ADMIN might imply several authorities such as CAN_EDIT_USERS, CAN_DELETE_RECORDS, etc.
Technically, roles are just a subset of authorities, with a naming convention (ROLE_ prefix) that helps to distinguish them and provide structure in security configurations. The distinction is more about convention and usage rather than any fundamental technical difference in how they operate within Spring Security.
Implementation: Both roles and authorities are usually implemented as strings in Spring Security and are represented by the same GrantedAuthority interface.
Prefix: Roles are conventionally prefixed with ROLE_, which allows Spring Security to distinguish them from other authorities. However, this is a convention, not a requirement.
Usage in Configuration: In configurations (like @PreAuthorize, @Secured, etc.), you often specify roles using the prefix, like hasRole(‘ADMIN’), which internally checks for ROLE_ADMIN.
Usage in Configuration: In configurations (like @PreAuthorize, @Secured, etc.), you often specify roles using the prefix, like hasRole('ADMIN'), which internally checks for ROLE_ADMIN.
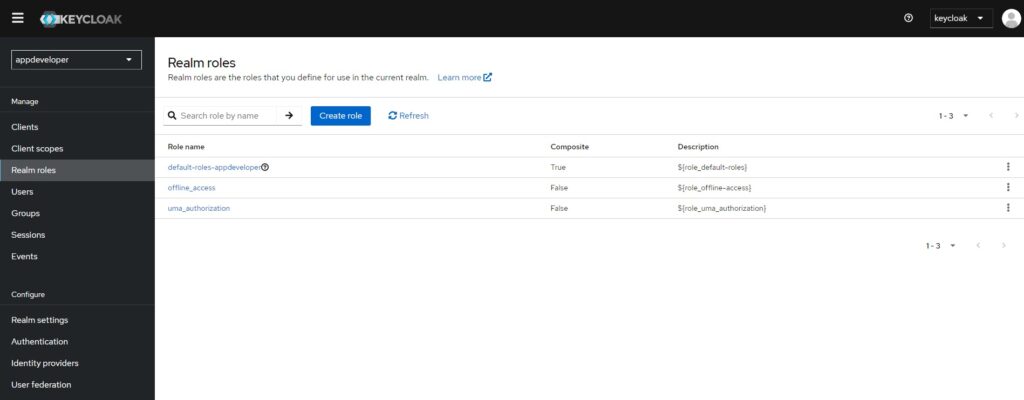
3. Create User Role in Keycloak
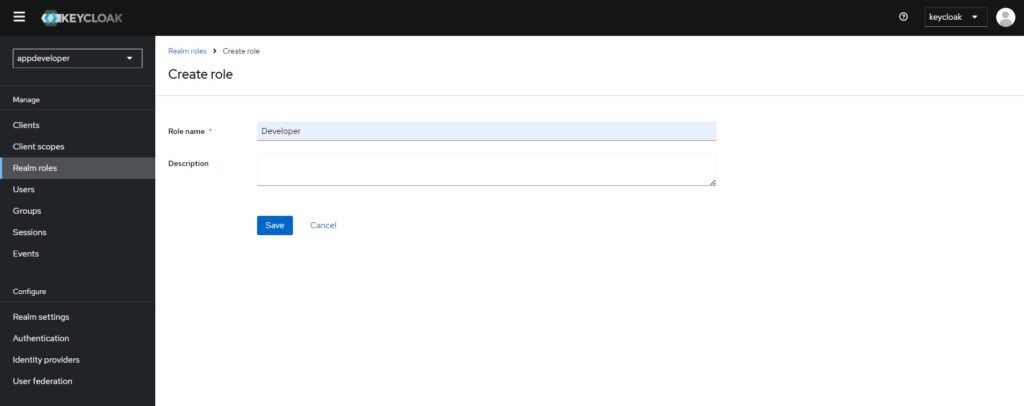
To create a new role in Keycloak, login to the Keycloak. Then navigate to Realm roles > Create role.
Provide the ‘Role name’ as ‘Developer’ and Save.
Now, we need to assign this role to the user. Navigate to Users > <user name> >Role mapping > Assign role.
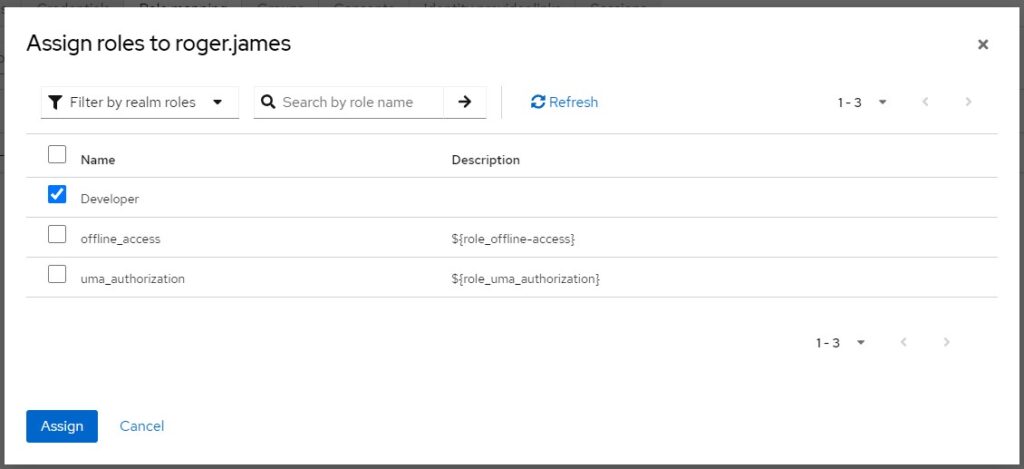
In our example, role Developer is assigned to user name roger.james.
4. Securing endpoint for a role in Resource Server
To secure a web service endpoint based on a particular role, we can use hasRole method.
.hasRole("Developer")
If you want to support multiple roles, then we can use hasAnyRole method. When using hasAuthority method we prefix “SCOPE_” such as ‘ROLE_’.
.hasAuthority('ROLE_Developer')
The way roles appear in an access token does depend on how the identity provider (IdP) server constructs that access token. In Keycloak, for instance, several factors influence how roles are represented in the access token, and this can vary depending on the configuration and the type of roles you’re working with (realm roles, client roles, or external roles from an IdP).
Spring Security provides a flexible way to convert roles from an access token into GrantedAuthority objects through custom converters. When working with OAuth2 or JWT tokens, especially in scenarios involving Keycloak or other identity providers, you can create a custom converter to extract roles from the token and convert them into authorities.
KeycloakRoleConverter.java
import java.util.ArrayList;
import java.util.Collection;
import java.util.List;
import java.util.Map;
import java.util.stream.Collectors;

import org.springframework.core.convert.converter.Converter;
import org.springframework.security.core.GrantedAuthority;
import org.springframework.security.core.authority.SimpleGrantedAuthority;
import org.springframework.security.oauth2.jwt.Jwt;

public class KeycloakRoleConverter implements Converter<Jwt, Collection<GrantedAuthority>> {
    @Override
    public Collection<GrantedAuthority> convert(Jwt jwt) {
        Map<String, Object> realmAccess = (Map<String, Object>) jwt.getClaims().get("realm_access");

        if (realmAccess == null || realmAccess.isEmpty()) {
            return new ArrayList<>();
        }

        Collection<GrantedAuthority> returnValue = ((List<String>) realmAccess.get("roles"))
                .stream().map(roleName -> "ROLE_" + roleName)
                .map(SimpleGrantedAuthority::new)
                .collect(Collectors.toList());

        return returnValue;
    }
}
Following is the security configuration class to check the role:
import org.springframework.context.annotation.Bean;
import org.springframework.context.annotation.Configuration;
import org.springframework.http.HttpMethod;
import org.springframework.security.config.annotation.web.configuration.EnableWebSecurity;
import org.springframework.security.config.annotation.web.builders.HttpSecurity;
import org.springframework.security.oauth2.server.resource.authentication.JwtAuthenticationConverter;
import org.springframework.security.web.SecurityFilterChain;

@Configuration
@EnableWebSecurity
public class WebSecurity {

    @Bean
    public SecurityFilterChain configure(HttpSecurity http) throws Exception {

        JwtAuthenticationConverter jwtAuthenticationConverter = new JwtAuthenticationConverter();
        jwtAuthenticationConverter.setJwtGrantedAuthoritiesConverter(new KeycloakRoleConverter());

        http
                .authorizeHttpRequests((authz) -> authz.requestMatchers(HttpMethod.GET, "/protected/hello")
                        .hasRole("Developer")
                        .anyRequest().authenticated())
                .oauth2ResourceServer(
                        oauth2 -> oauth2.jwt(jwt -> jwt.jwtAuthenticationConverter(jwtAuthenticationConverter)));

        return http.build();
    }
}
5. Test our changes
Now with all the changes done, we should test our changes.
- Get a valid token (refer to the previous tutorials).
- Access the protected resource
/protected/hello. - You should be able to access the resource.
- Now change the
.hasRole("Developer")to something else, such as.hasRole("Manager"). - Not try again to access the protected endpoint
/protected/hello. If you get error message with status code403 Forbidden, then your changes are working fine.
6. Conclusion
In this tutorial, we explored how to implement Role-Based Access Control (RBAC) using Keycloak, a powerful identity and access management solution. Keycloak provides a flexible way to define, manage, and assign roles at both the realm and client levels, which can be used to control access to resources in your applications.